
Your monthly book club meeting is coming up, and it’s your turn to notify everyone of the time and place. You could address an email message to each member of the club by typing or adding each email address separately, or you could use groups with the Contacts app to make communication with co-workers, friends, and family easier.
Getting set up
Make sure you have accurate contact information for the people to whom you want to send email. It’s best to do all your group set-up work on your Mac, because you cannot create groups or add members to them on your iOS device. If you have a lot of work to do to get your contacts’ information whipped into shape, it’s much easier to do so on the Mac’s larger screen and full-size keyboard.
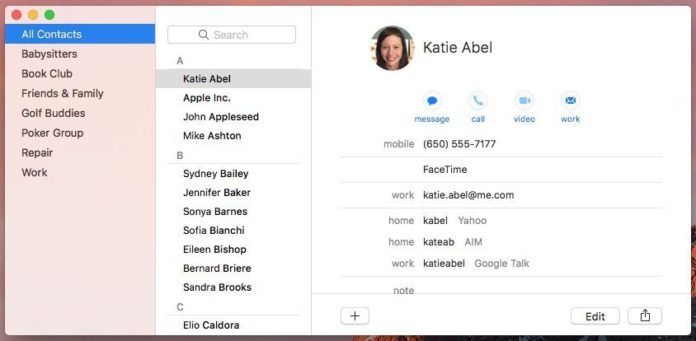
Adding a new contact on a Mac
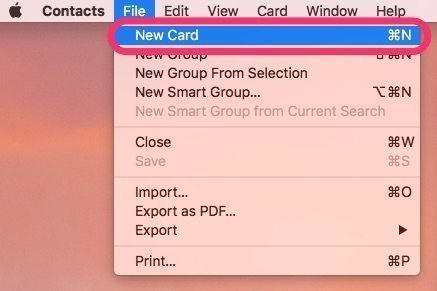
- Launch Contacts. If the icon for Contacts is not already in the dock, look for it in the Applications folder. (In the Finder, choose Go > Applications.)
- Choose File > New Card.

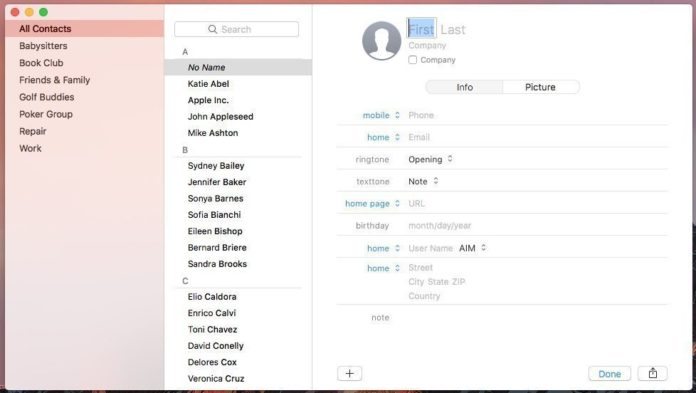
- Enter the data in the appropriate fields. You can add multiple entries (for example, multiple email addresses) in many of the categories and you can change the blue labels (for example, to indicate home and work email addresses).
- If you need to add another new card choose File > New Card.
- When you are finished adding cards, click Done.
Adding a new contact on your iOS device
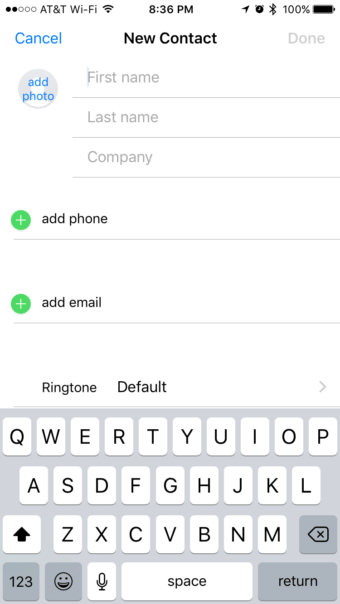
- Tap Contacts. If you’re not sure where the Contacts app is, look for it in the Extras folder or search for it using Spotlight search.
- Tap the + button at the top of the contacts list.
- Enter the data in the appropriate fields. You can add multiple entries (for example, multiple email addresses) in many of the categories and you can change the blue labels (for example, to indicate home and work email addresses).
- When you are finished adding data to the card, tap Done.

Editing contact information on a Mac
- Launch Contacts. If the icon for Contacts is not already in the dock, look for it in the Applications folder. (In the Finder, choose Go > Applications.)
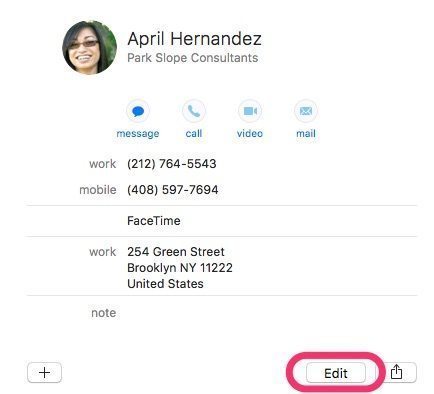
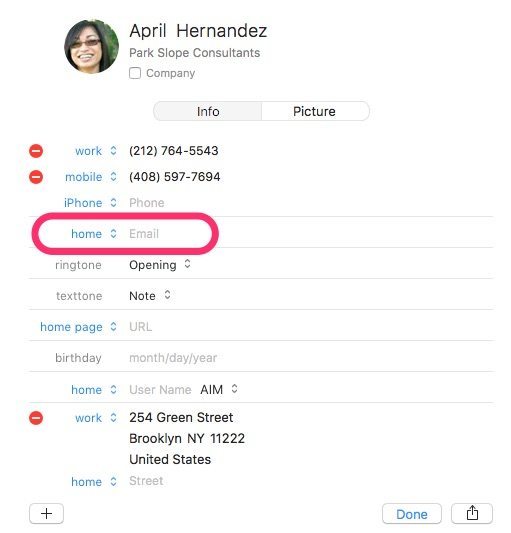
- Locate the contact card for someone to add email addresses and phone numbers.
- Click Edit.
- Click in the email field and enter the person’s email address.
- Click the label and choose a description of the email address (e.g., home, work).
- Click Done.
Repeat these steps for as many people as you want.
Editing contact information on your iOS device
- Tap Contacts. If you’re not sure where the Contacts app is, look for it in the Extras folder or search for it using Spotlight search.
- Tap the name of a contact to add email addresses and phone numbers.
- Tap Edit.
- Tap add email and enter the person’s email address.
- Tap the label and choose a description of the email address (e.g., home, work).
- Tap Done.
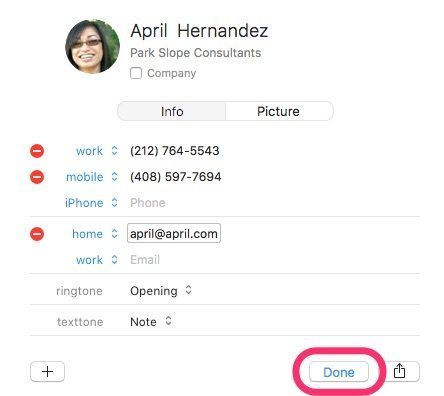
Steps 3, 4, and 6: Edit, add an email address, and done!

Repeat these steps for as many people as you want.
Remember, if you are syncing your contacts’ information via iCloud, you only have to edit your contacts on one device.
Now it’s time to make a group.
There are two ways to create a group: (1) Make the new group first and add people to it or (2) Select the people first and create the group to contain them.
If you are syncing contacts through iCloud and you want the group to appear on all your devices, make sure to create the group within iCloud, and not within On My Mac.
How to make a new group, and add people to it
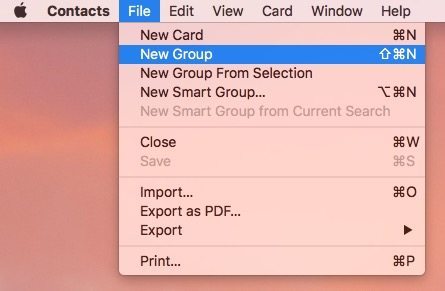
- Make sure the Groups column is showing. If it isn’t, choose View > Show Groups.
- Make a new group by choosing File > New Group.
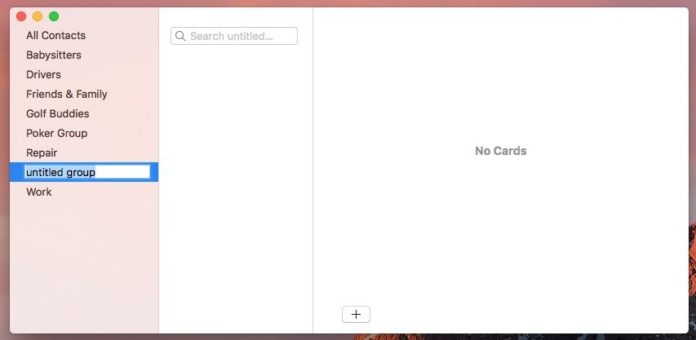
- A new untitled group is created. Type a name for the group, such as “Book Club”.
- Click the All Contacts group to show all your contacts.
- Locate the people you want to put in the group and drag them to the name of the group.


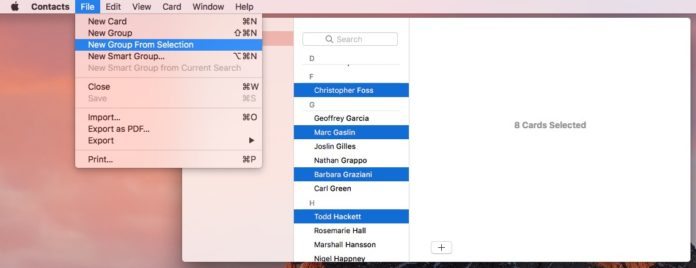
Select people, then create a group for them
- Click the All Contacts group to show all your contacts.
- Select the people to put in your group. Hold down the command key on the keyboard and click names to select as many people as you want.
- Choose File > New Group from Selection.
- A new untitled group is created. Type a name for the group, such as “Book Club”.
To add more people to a group at any time, just drag their names to the group name.
To delete a group member, select the group in the group list, select the name you want to delete, and press the delete key on your keyboard. You’ll be given the option to delete the card or remove it from the group.
There is one more type of group: a smart group. Think of a smart group as a saved search. You specify a set of conditions, and the Contacts application will create a group based on those conditions. It can even update itself when new contacts that meet those conditions are added. Smart groups only work on the Mac, not on iOS devices.
Making a Smart Group on a Mac
- Launch Contacts. If the icon for Contacts is not already in the dock, look for it in the Applications folder. (In the Finder, choose Go > Applications.)
- Make sure the Groups column is showing. If it isn’t, choose View > Show Groups.
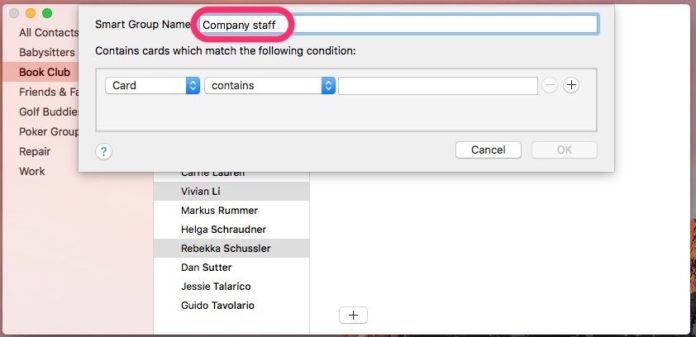
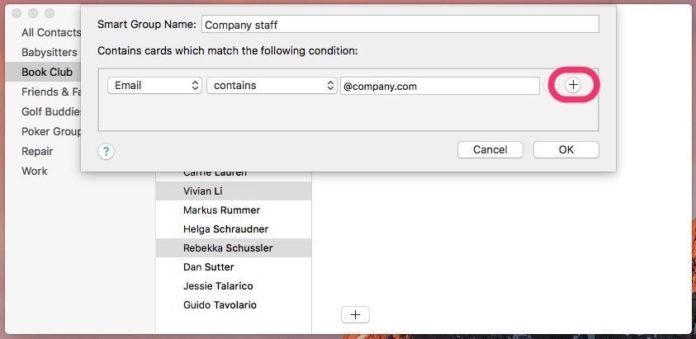
- Choose File > New Smart Group….
- In the sheet that appears enter a name for the smart group.
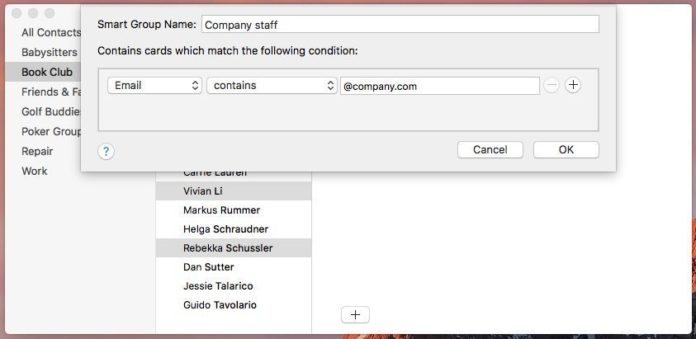
- Click the pop-up menus to select conditions. For example, if you wanted to create a smart group of people with an email address at company.com, set the pop-up menus to read “Email” and “contains” and enter “@company.com” in the condition field.
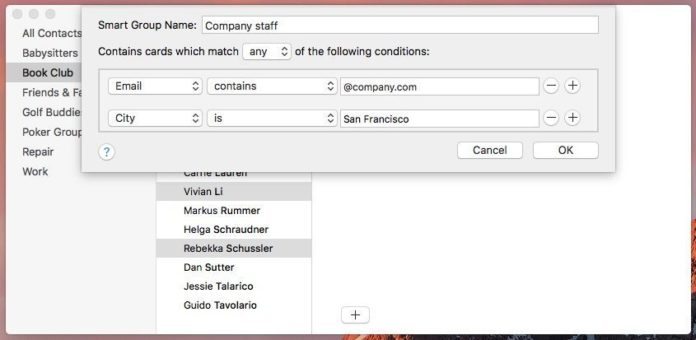
- Click the + button to add more conditions if necessary. For example, if you wanted to include contacts who live in San Francisco, set the pop-up menus to read “City” and “is” and enter “San Francisco” in the condition field.
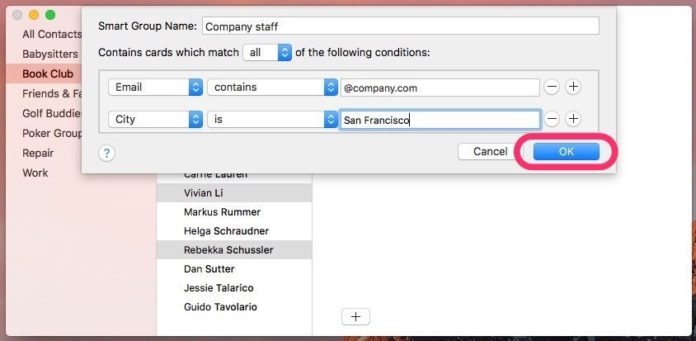
- If you have more than one condition, in the pop-up menu above the list of conditions, choose any or all as the match criterion. For example, if you wanted your smart group to contain all contacts with an email address at company.com as well as any contact who lives in San Francisco, choose “any” from the pop-up menu. If you want the smart group to contain only people with a company.com email address who also live in San Francisco, choose “all” from the pop-up menu.
- Click OK.


Smart groups appear in a separate category in the groups sidebar. 
If you want to edit the smart group’s conditions later, select it in the groups list and choose Edit > Edit Smart Group.
Now, let’s put these groups to good use.
Addressing email to a group using your Mac
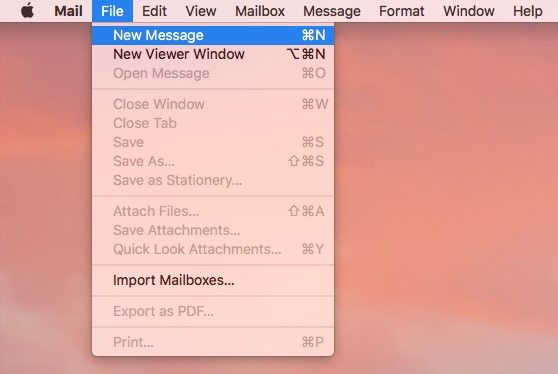
- Launch Mail.
- Choose File > New Message.
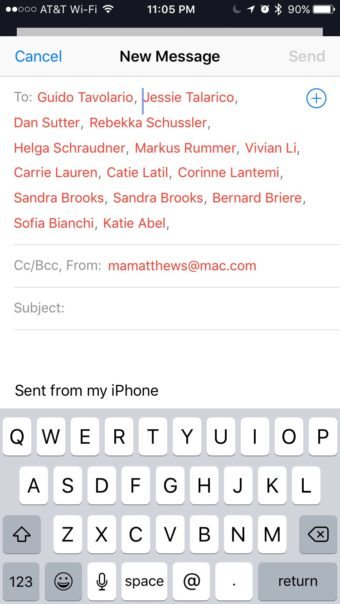
- In the To: field, type the name of your group and press return. Your email message will be addressed to everyone in your group.
Type the name of the group. The addresses in the group are shown after pressing Return on the keyboard.


Addressing email to a group using your iOS device
- Tap Mail.
- Tap the New Message button.
- In the To: field, type the name of your group.
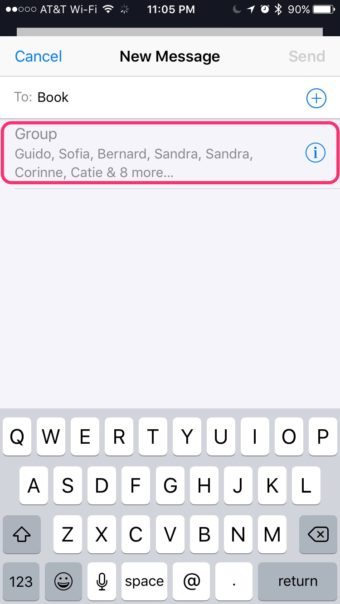
- Beneath the To: line, tap your group. The group may be labeled only as “Group”, but the names of the members will be shown. Your email message will be addressed to everyone in your group.


Six power tips
• You can also type group names into the other address fields (cc:, bcc:) of your message.
• To see each person’s groups, in Contacts on your Mac, select the person, then hold down the option key. The groups the person is a member of will appear in blue.
• Unfortunately, one group cannot contain other groups.
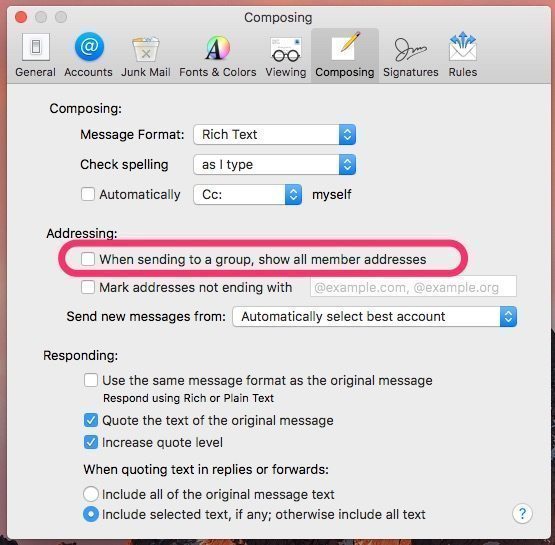
• You can set up Mail on your Mac to show the name of the group rather than all the group’s members in your email message:
- Choose Mail > Preferences.
- Click Composing.
- Uncheck the box for When sending to a group, show all member addresses. If you choose to go with just the group name in your email message, you can click on the group and choose Expand Group to display the individual email addresses of the group members.


 If you choose to go with just the group name in your email message, you can click on the group and choose Expand Group to display the individual email addresses of the group members.
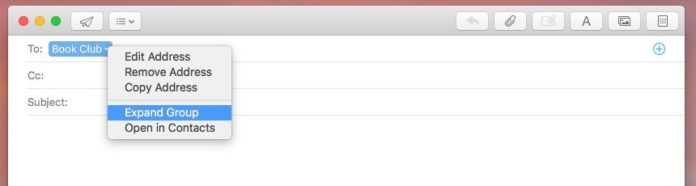
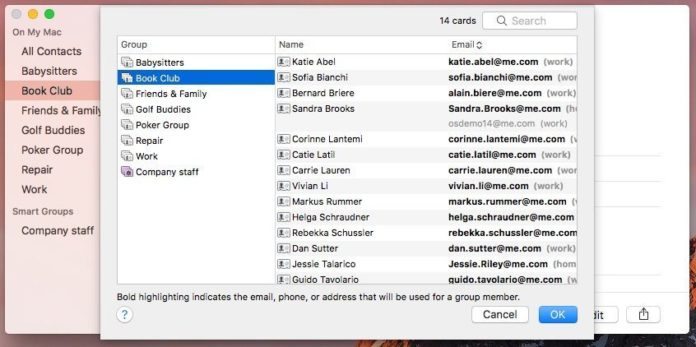
• If one of the members of a group has more than one email address, you can decide which address is active for the group:
- In Contacts on your Mac, select the group.
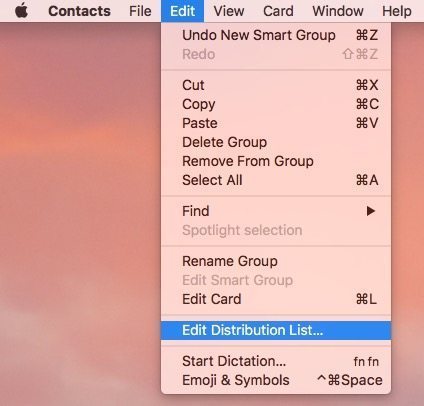
- Choose Edit > Edit Distribution List….
- In the sheet that appears, click the preferred address for each of the people in the group. If you want a person to have multiple addresses in the group, add a second card for the same person, but with a different preferred address.

• Even though you can select the preferred addresses on your Mac, this information will not sync to your iOS device. If you tap the name of a group in Mail on your iOS device, all the email addresses of the people in the group will appear. You’ll need to delete the addresses you don’t want to use.
Do you use groups within Mail?
Using groups inside of Apple’s default Mail application is a great way to save time. Do you use groups with Apple Mail? Let me know in the comments section.
